What is CHIRP Sonar?
If you’re an angler who loves spending time on the water, you’ve probably heard the buzz about CHIRP sonar. But what exactly is it? CHIRP stands for Compressed High-Intensity Radiated Pulse, and it’s a game-changer in fish finding technology. Unlike traditional sonar—which sends out a single frequency at a time—CHIRP sonar uses a range of frequencies in each pulse. This approach gives you much clearer and more detailed images of what’s beneath your boat.
The history of CHIRP sonar actually traces back to military use, where precision was everything. Over time, as technology advanced, this sophisticated system made its way into recreational fishing gear. Now, even weekend anglers can access the kind of clarity that used to be reserved for pros and scientists.
So, how is CHIRP different from old-school sonar? Traditional sonar works by sending out one steady signal, which can sometimes blur objects together or miss smaller fish hiding near the bottom. CHIRP, on the other hand, sweeps through a spectrum of frequencies. That means it can separate fish from structure and show you individual targets with much greater accuracy. Whether you’re after bass in shallow water or hunting stripers in deep lakes, CHIRP helps you find more fish—and have more fun doing it.
2. How CHIRP Sonar Works
If youve ever wondered what makes CHIRP sonar stand out from traditional fish finders, its all about how it sends and receives signals beneath the waters surface. Unlike old-school sonars that shoot out a single frequency at a time, CHIRP—which stands for Compressed High-Intensity Radiated Pulse—sends a continuous sweep of frequencies. This approach lets you see way more detail, almost like switching from standard definition TV to full-on HD.
The Science Behind CHIRP
Traditional sonar systems send out one “ping” at a set frequency and then listen for the echo. But CHIRP blasts a range of frequencies (from low to high) in each pulse. When these pulses bounce back from objects underwater, the system processes them together to create a much clearer image. It’s kind of like tuning into several radio stations at once, so you don’t miss any important news happening down below.
CHIRP vs. Traditional Sonar: A Quick Comparison
| Feature | Traditional Sonar | CHIRP Sonar |
|---|---|---|
| Signal Type | Single Frequency Pulse | Sweeping Range of Frequencies |
| Image Clarity | Lower, More Blurry Returns | High Definition, Crisp Images |
| Target Separation | Poor—Fish and Structure Blend Together | Excellent—Easy to Distinguish Fish from Debris or Bottom |
| Depth Performance | Loses Detail in Deep Water | Keeps Clarity Even in Deeper Waters |
Real-World Impact on Fishing Trips
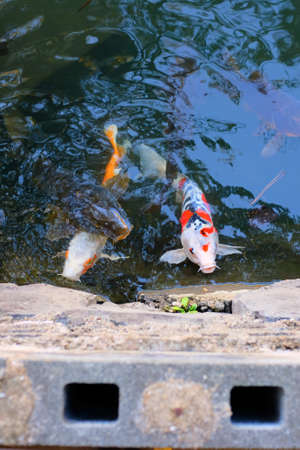
This tech upgrade isn’t just about cool science—it really matters when you’re out on the lake or river. With CHIRP, you can spot baitfish schools, tell big game fish from smaller ones, and even identify subtle changes in bottom structure. That’s why so many anglers across the U.S., whether fishing for largemouth bass in Texas or walleye up north, are making the switch to CHIRP-based units. It’s technology that brings more fish stories—and fish fries—home at the end of the day.

3. Benefits of CHIRP for American Anglers
If you’re an angler who loves exploring America’s diverse waters—whether it’s the deep lakes of Minnesota, winding rivers in the South, or bustling coastal bays along the Atlantic and Pacific—CHIRP sonar technology is truly a game-changer. What sets CHIRP apart is its ability to send a continuous sweep of frequencies, giving you clearer and more detailed images beneath your boat. This means less guesswork and more confidence every time you head out.
Sharper Fish Targets
One of the biggest advantages for American anglers is CHIRP’s ability to separate fish from structure, debris, or bait clouds. In places like Lake Erie or the Mississippi River, where fish often hug the bottom or mingle with vegetation, this clarity makes a real difference. You’ll be able to spot trophy bass hiding in brush piles or schools of crappie suspended just off the drop-off.
Better Performance in All Water Types
From murky southern bayous to crystal-clear mountain reservoirs, CHIRP adapts seamlessly. It cuts through noise and clutter—think choppy days on the Chesapeake Bay or heavily trafficked summer weekends on Lake Tahoe—so you get accurate readings no matter where you cast your line.
Deeper and Broader Coverage
CHIRP isn’t just about detail; it’s also about range. Whether you’re chasing stripers offshore or searching for catfish in a sprawling Texas reservoir, CHIRP sonar gives you reliable coverage at greater depths and wider angles. That means you can cover more water in less time—a huge plus when conditions change fast or fishing spots are crowded.
More Time Fishing, Less Time Searching
At the end of the day, American anglers want to spend more time enjoying nature and reeling in fish—not staring at confusing screens or second-guessing what’s below. CHIRP helps take the frustration out of finding fish so you can focus on what matters: sharing stories at the boat ramp, grilling up your catch with friends, and making memories on America’s iconic waters.
4. Using CHIRP Sonar to Find More Fish
When it comes to putting more fish in the boat, American anglers are increasingly turning to CHIRP sonar for its precision and versatility. Unlike traditional sonar, CHIRP’s ability to sweep through a range of frequencies means you get detailed images and less clutter on your screen. But how do you actually use these features out on U.S. lakes, rivers, or coastal waters? Here are some practical tips and real-world scenarios to help you make the most of your CHIRP sonar and boost your catch rate.
Real-Life Tips for Leveraging CHIRP Features
- Fine-Tune Sensitivity: Don’t just stick with factory settings. Adjust sensitivity based on water clarity and depth. In murky Midwest lakes, increase sensitivity to pick up subtle returns from bass or crappie hugging the bottom.
- Target Suspended Fish: Use high-frequency CHIRP (e.g., 200 kHz) to clearly mark schools of suspended fish like stripers in deep reservoirs common in the South.
- Identify Structure and Bait: Low-frequency CHIRP (e.g., 50 kHz) penetrates deeper—ideal for finding walleye near rock piles in Great Lakes waters or identifying bait balls off the Pacific coast.
- Zoom In on Details: Many modern CHIRP units offer split-screen views. Use one side for a broad overview and the other zoomed-in to distinguish between fish arches and underwater brush.
Sample Scenario: Bass Fishing in Florida
You’re fishing Lake Okeechobee during early spring. Set your CHIRP sonar to cover both shallow grass beds (high frequency) and adjacent drop-offs (medium/low frequency). Watch for clusters of returns above submerged vegetation—these often indicate largemouth bass staging before the spawn. By interpreting signal color and shape, you can decide whether to cast a soft plastic or move spots.
Comparing Traditional vs. CHIRP Sonar: What You See Matters
| Feature | Traditional Sonar | CHIRP Sonar |
|---|---|---|
| Fish Target Separation | Poor; fish blend into structure | Excellent; individual fish stand out |
| Depth Penetration | Adequate in shallow water | Superior at all depths, even saltwater |
| Clarity in Murky Water | Muddy images; hard to interpret | Crisp returns; less noise/clutter |
| Bait Ball Identification | Easily missed or confused with debris | Bait balls shown as distinct clouds |
Pro Tip: Keep an Eye on Water Temperature and Speed Data!
Your CHIRP unit isn’t just about sonar returns—most models display water temp and boat speed right on screen. Combine this data with your readings to pinpoint not only where fish are, but when they’re most likely to bite. For example, trout in mountain streams may cluster where cool currents meet warmer runoff, while catfish in Southern rivers prefer slower-moving holes during summer heat.
5. Choosing the Right CHIRP Unit
Selecting the ideal CHIRP sonar for your fishing adventures isn’t a one-size-fits-all decision—especially with the variety of American waters and angling styles out there. Whether you’re casting for largemouth bass on a small Midwest lake, chasing stripers off the Atlantic coast, or exploring deep reservoirs in the Rockies, matching your sonar unit to your needs makes all the difference.
Consider Your Fishing Style
If you’re a weekend warrior who enjoys relaxed outings on local ponds or lakes, an entry-level CHIRP unit with basic features like down imaging and clear target separation might be just right. On the other hand, tournament anglers or serious offshore fishermen should look for advanced models offering multiple frequency options, side imaging, and GPS mapping to cover more water efficiently and zero in on those honey holes.
Match the Unit to Your Boat
Bass boats, kayaks, and saltwater center consoles all have different space and mounting requirements. Compact, portable CHIRP units are perfect for kayaks and jon boats, while larger vessels can accommodate high-powered systems with bigger screens and networking capabilities—ideal when you need to keep tabs on changing conditions or share data with other anglers on board.
Think About American Waters
The vast diversity of U.S. fishing environments means you’ll want a CHIRP unit that handles both shallow flats and deep channels. Adjustable frequency ranges allow you to dial in performance based on depth: lower frequencies for deep water clarity, higher ones for detailed structure in the shallows. If you fish the Great Lakes or coastal saltwater, look for units rated for rougher conditions and capable of handling brackish or saline environments.
User-Friendly Features Matter
Ease of use is key—nobody wants to spend their whole trip fiddling with buttons. Look for intuitive menus, crisp display screens (easy to read even under bright sun), and quick install kits. Many American anglers also appreciate WiFi or Bluetooth connectivity so they can sync maps, mark waypoints, and get software updates right from their phone or tablet.
Ultimately, choosing the right CHIRP sonar comes down to knowing your waters and your fishing style. Take time to compare specs, read reviews from fellow U.S. anglers, and consider demoing a few units if possible. With the right gear dialed in, you’ll be set to find more fish—and make every trip a story worth telling back at the dock.
6. Getting Started with Your CHIRP Sonar
Ready to take your fishing game to the next level? Setting up your CHIRP sonar doesn’t have to be intimidating, even if you’re new to fish finders. Here’s a simple, step-by-step guide to help you get started and make the most out of your device on everyday fishing trips—whether you’re casting from a bass boat or paddling your favorite kayak.
Step 1: Mount Your Transducer Properly
The heart of any sonar system is its transducer. For best results, follow your manufacturer’s instructions for mounting. On boats, secure the transducer where it will always stay underwater, away from turbulence or bubbles. For kayaks or portable setups, look for easy-mount kits designed specifically for small crafts. A well-placed transducer ensures accurate readings and clearer images.
Step 2: Power Up and Connect
Once mounted, connect the transducer cable to your CHIRP unit and hook up the power supply—usually straight to your boat or a dedicated battery. Double-check all connections are snug and weather-tight before turning on the system.
Step 3: Choose Your Frequency Settings
CHIRP sonar allows you to sweep across a range of frequencies instead of locking onto just one. Start with default settings if you’re unsure; most units offer an “auto” mode that’s surprisingly good for general fishing. As you gain confidence, experiment: lower frequencies (around 80–100 kHz) are great for deep water, while higher ones (150–200 kHz) give sharper detail in shallow lakes and rivers.
Pro Tip:
If you’re fishing for crappie in a shallow cove, bump up the frequency for crisper images. Chasing stripers offshore? Dial it down for greater depth penetration.
Step 4: Adjust Sensitivity and Range
Sensitivity controls how much detail shows up on your screen. Too high, and you’ll see clutter; too low, and you might miss fish hugging the bottom. Start around 70%, then tweak as needed based on water conditions and clarity. Set your depth range just below the maximum depth where you’re fishing—this keeps the display focused on where the action is.
Step 5: Interpret What You See
The beauty of CHIRP is in its clarity—you’ll notice fish arches look more defined and structure stands out. Spend time learning what bait schools versus single fish look like on your display. Don’t worry if it takes a few trips; soon enough, reading sonar will feel as natural as tying on a lure at sunrise.
Everyday Application:
No need for complicated tech talk—just use these steps each time you launch. After a little practice, adjusting settings to match today’s conditions becomes second nature. Before long, you’ll be spotting those hidden honey holes like a pro, making every trip more productive and fun.