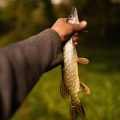
Gear Essentials for Walleye Trolling
If you want to troll for walleye like a seasoned pro on American waters, your gear selection is where it all begins. The right setup not only increases your odds of landing fish but also makes the whole experience more efficient and enjoyable. Let’s break down the must-haves for successful walleye trolling.
Rods: Backbone Meets Sensitivity
Trolling rods for walleye should strike a balance between backbone and sensitivity. Medium to medium-light power rods in the 66″ to 86″ range are popular, providing enough flex to absorb strikes but enough strength to handle big fish or heavy lures. Fiberglass or composite blanks excel at absorbing the shock from hard hits and keep fish pinned during the fight—especially important when running crankbaits or bottom bouncers.
Reels: Smooth Drag and Line Capacity
A quality line counter reel is a game-changer for American walleye anglers. Line counters let you precisely replicate productive presentations by tracking how much line you have out. Look for reels with smooth drags and enough capacity to handle long trolling runs, especially if you’re targeting deeper basins on big lakes like Lake Erie or Mille Lacs.
Line: Match Your Method
Braided line (10-20 lb test) is a go-to for trolling due to its thin diameter, zero stretch, and excellent sensitivity—it helps transmit subtle bites even at speed. However, many anglers run a fluorocarbon leader (6-12 lb test) for stealth near pressured walleye or in clear water. Mono still has its place, especially when you want a little stretch as a shock absorber.
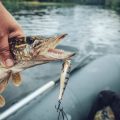
Lures: Crankbaits, Spinners, and More
Your tackle box should cover multiple bases: stickbaits, shad-style crankbaits, crawler harnesses, and spoons all play their part depending on season and forage. Hot colors like firetiger, perch, and chrome/blue are always in rotation on classic walleye lakes from Minnesota to Ohio. Don’t overlook tuning your crankbaits—they need to run true for maximum effectiveness.
Electronics: Modern Tools for an Old-School Game
Fish finders with GPS mapping and side-imaging sonar have become essential for serious walleye trollers. Use them to mark key structure, bait clouds, and even track individual fish movements. Modern units can store waypoints so you can revisit productive trolling passes again and again—critical when chasing scattered schools across open water.
Setting Up Your Trolling Spread
Dialing in your trolling setup is a game changer when targeting walleye, especially on bigger waters like Lake Erie or the Great Lakes. Getting your spread right means more lines in the water and better coverage of active fish. Here’s how you can maximize your odds by rigging multiple rods, deploying planer boards, and setting up your boat for effective trolling.
How to Rig Multiple Lines
In most states like Michigan or Minnesota, you’re allowed two or three rods per angler, so take full advantage. Stagger your line lengths and lure depths to cover different parts of the water column. Use rod holders mounted along both sides and the transom, ensuring rods don’t tangle on turns. Here’s a quick reference for a typical 3-person setup:
| Rod Position | Lure Type | Line Length (ft) |
|---|---|---|
| Port Side (Outside) | Shallow Crankbait | 120-150 |
| Port Side (Inside) | Spoon/Bouncer Rig | 70-90 |
| Stern (Center) | Deep Diving Plug | 180+ |
| Starboard Side (Inside) | Bouncer/Worm Harness | 70-90 |
| Starboard Side (Outside) | Shad Rap/Stickbait | 120-150 |
Using Planer Boards for Wider Coverage
If you want to cover more water and avoid spooking walleyes under the boat, planer boards are the ticket. Clip them to your mainline and send them out away from the boat path—left and right sides—to troll baits well beyond your prop wash. Inline boards like Church Tackle or Off Shore are popular in the Midwest. Adjust board placement based on wind direction and waves; staggered distances help prevent tangles during turns.
Planer Board Placement Tips:
- Outside Boards: Run shallow baits 100-150 feet out.
- Inside Boards: Try deeper rigs 50-80 feet out.
- Straight Back: Reserve these lines for deep divers or lead core setups.
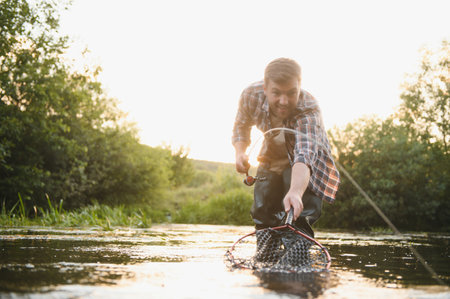
Managing Boat Setup for Effective Trolling
Your boat layout matters as much as your tackle. Install quality rod holders that can be adjusted for angle and height. Use a kicker motor or electric trolling motor for speed control—most walleye pros prefer speeds between 1.0 and 2.5 mph depending on season and bite. Keep gear organized: net ready, pliers close, extra lures accessible. Assign roles—one person steers, another watches rods, another handles netting. Communication is key when multiple lines hook up at once.
With this setup, you’ll maximize every pass and increase your odds of filling the livewell with American gold—walleyes!
![]()
3. Dialing in Trolling Speed
When it comes to trolling for walleye, speed isn’t just a number—it’s a game changer. Getting your trolling speed dialed in can mean the difference between a slow day on the water and filling your livewell. Walleyes are notorious for being picky, and their willingness to strike is often tightly linked to how fast your bait or lure moves through the water.
Understanding Speed Sensitivity
Walleye react differently depending on water temperature, weather conditions, and even the time of year. In cold spring or fall waters, walleyes are sluggish and tend to favor slower presentations—think 0.8 to 1.2 mph. As summer warms things up, their metabolism increases and so does their chase factor; speeds in the 1.5 to 2.5 mph range often trigger more aggressive strikes. Always remember: if you’re not getting bites, tweak your speed before changing lures.
Finding the Sweet Spot
The best trolling speed is rarely static. Start by matching your speed to the conditions—slower in cold water, faster as it warms up—and then fine-tune based on fish response. Use GPS to monitor your speed precisely, as even small changes can make a big difference with walleye. If you’re marking fish but they’re not biting, bump your speed up or down by increments of 0.1-0.2 mph until you find what works.
Tactical Tips for Variable Conditions
- On windy days, let the wind push you along at a natural drift and adjust your throttle only as needed.
- In clear water, walleyes are more cautious—slow it down and give them time to inspect your bait.
- Muddy or stained water calls for a little more speed and flash to help fish locate your presentation.
- Don’t forget about current: troll against it for more control over lure action and depth.
Ultimately, dialing in trolling speed is an ongoing experiment each day on the lake. Stay observant, keep tweaking, and let the walleyes tell you what they want. Once you find that sweet spot, stick with it—but always be ready to adapt as conditions change.
4. Mastering Depth Control
Getting your bait into the walleye’s strike zone is crucial when trolling. Walleyes are notorious for relating to specific depths, and if you’re not dialed in, you’ll miss out on bites. Here’s how you can fine-tune your depth control using weights, diving devices, and line counters—three essential tools every walleye angler should master.
Using Weights for Precise Depth
Snap weights and inline sinkers are effective for getting your lure down fast. The heavier the weight, the deeper your presentation will run. The table below shows approximate depths based on common weights and trolling speeds:
| Weight (oz) | Line Out (ft) | Trolling Speed (mph) | Approx. Depth (ft) |
|---|---|---|---|
| 1 | 50 | 1.5 | 12-14 |
| 2 | 50 | 1.5 | 20-22 |
| 3 | 50 | 1.5 | 28-30 |
Tip: Use lighter weights for shallow weedlines or early season flats, and bump it up when targeting deep mid-summer structure.
Divers: Go Deep Without Heavy Lead
Diving planers like the popular Dipsy Diver or Jet Diver get your baits down and away from the boat. Each diver size is rated for different depth ranges depending on line length and speed. This lets you present lures at multiple depths by running different divers on each rod.
| Diver Size | Line Out (ft) | Trolling Speed (mph) | Approx. Depth (ft) |
|---|---|---|---|
| #0 (Small) | 100 | 2.0 | 15-18 |
| #1 (Medium) | 100 | 2.0 | 25-30 |
| #3 (Large) | 100 | 2.0 | 35-40 |
Pro Move: Use divers off planer boards to cover more water horizontally without tangling lines.
The Power of Line Counters for Consistency
A line counter reel takes the guesswork out of depth control by letting you know exactly how much line you’ve got out. Combine this with dive charts provided by lure manufacturers, and you can duplicate productive setups down to the foot. This consistency helps you pattern fish quickly—no more relying on “feel” or guesswork.
Troubleshooting Depth Issues:
- If you’re snagging bottom: Shorten your line or lighten your weight/diver.
- If you’re not contacting fish: Let out more line, use a heavier weight, or switch to a deeper-diving device.
- If wind/current changes: Adjust speed or switch up your setup to maintain depth.
Killer Combo Example:
Troll a #7 deep-diving crankbait behind a 2 oz snap weight at 1.8 mph with 75 feet of line out; check the lure’s dive chart for a precise target depth—perfect for suspended summer walleyes.
Nailing depth control is what separates rookie trollers from seasoned walleye hunters. Practice with different setups and keep notes so you can repeat success on every trip.
5. Essential Trolling Tactics
When it comes to trolling for walleye, adapting your approach to the water conditions and fish behavior is key. No matter how dialed-in your setup is, you need to stay flexible and use time-tested tactics that match the variables on any given day.
Adapting to Water Clarity
Walleye are notorious for their sensitivity to light. In clear water, run longer leaders and use natural, subtle lure colors like silver, white, or perch patterns. Keep your trolling passes farther from the boat to avoid spooking them. In stained or murky water, brighter colors like chartreuse, fire tiger, or orange stand out better. Try lures with rattles or extra vibration to help walleye locate your bait.
Reading Structure and Cover
Keying in on structure—like drop-offs, weed edges, rock piles, and humps—is critical. Use your electronics to identify these features and troll parallel or just above them. Adjust your lure depth so it runs just off the bottom or skims the tops of weeds and rocks where walleyes hold tight. Don’t be afraid to make repeated passes over productive areas at different angles.
Adjusting for Weather Conditions
On bright, calm days, walleyes often slide deeper or become less active. Slow down your troll and downsize your presentation. On windy days or under low-light conditions, they may move shallower and feed more aggressively—try speeding up slightly and using larger lures. Cloud cover can extend the bite window near structure or along breaklines.
Seasonal Walleye Patterns
Spring walleyes are usually shallow and near spawning grounds; troll small crankbaits or stickbaits over sand flats and rocky points. In summer, they often scatter across deeper basins or relate to mid-lake structure—leadcore line or snap weights can help reach suspended fish. During fall, focus on steep breaks close to shore as walleyes prepare for winter; slow down your troll and use baits that mimic dying baitfish.
Tried-and-True Techniques
Always pay attention to details: vary trolling speed until you get strikes, experiment with lure color every hour or two, and keep a log of what works in different conditions. Running a spread of lures at different depths lets you cover more water and dial in the bite faster. Above all, stay observant—walleyes reward anglers who adapt quickly and fish smart no matter what Mother Nature throws at them.
6. Reading Water and Finding Fish
Locating active walleye is half the battle when trolling, and successful anglers know how to read water efficiently. Start with a quality lake map—physical or digital—to identify likely walleye hotspots such as drop-offs, points, submerged humps, and weed edges. Walleye are structure-oriented fish, especially in American lakes and reservoirs, so focus your efforts where these features intersect with baitfish activity.
Interpreting Lake Maps
Topographical lake maps reveal underwater contours that can lead you straight to productive trolling lanes. Look for steep breaks and transition zones between shallow flats and deeper basins. In spring and fall, walleye often hold closer to shorelines or mid-lake humps, while in summer, they tend to slide deeper along channel edges or thermoclines. Mapping out a route that follows these changes in depth will up your odds of finding fish.
Using Sonar Effectively
Your fish finder is one of the most valuable tools on board. Set your sonar sensitivity high enough to distinguish bait balls from bottom clutter. Pay attention to arches or streaks just off the bottom—classic signs of walleye holding tight to structure. Down imaging and side imaging can help you spot isolated rocks or submerged timber where big fish lurk. Adjust your trolling passes based on what the sonar reveals; don’t waste time over barren water.
Local Tips and Seasonal Patterns
Never underestimate the power of local knowledge. Visit bait shops, marinas, or online fishing forums dedicated to your target lake or river. American anglers are usually willing to share general info about current hot spots, productive depths, and effective lure colors—just remember to return the favor with your own tips down the line. Combine this local intel with seasonal movements: in early summer, look for walleyes following spawning shiners onto shallow flats at dawn; by midsummer, shift deep as fish chase cooler water and suspended forage.
By mastering the art of reading water through maps, electronics, and reliable local advice, you’ll consistently pinpoint active walleye and make every trolling pass count across America’s diverse fisheries.