Understanding Ice Formation and Types of Ice
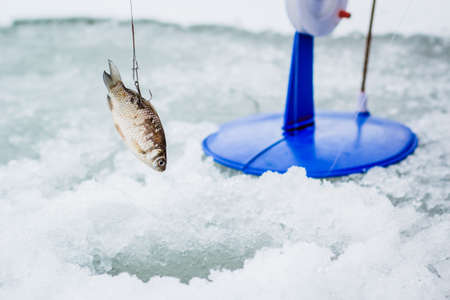
If you want to fish hardwater safely, you need to start with the basics—how ice forms and what kind of ice you’re actually standing on. Not all ice is created equal, and knowing the difference can save your life. When winter first hits, cold temps drop the water’s surface below 32°F, forming a thin sheet of ice. If conditions stay cold and calm, this layer thickens into what’s called clear ice or “black ice.” It’s not actually black—it just looks that way because it’s dense, strong, and free of air bubbles, letting you see through to the dark water or lake bottom. This is the good stuff; four inches of clear ice is generally safe for walking.
But Mother Nature doesn’t always play nice. If snow falls onto a fresh or forming sheet of ice, it insulates the surface, slowing down the freezing process. Even worse, heavy snow pushes down on existing ice, causing water to seep up and mix with the snow. The result? White ice (sometimes called “snow ice”), which is cloudy, less dense, full of air pockets—and much weaker than its clear counterpart. Don’t let a thick-looking patch fool you: ten inches of white ice can be less safe than half that amount of clear ice.
So before you step out with your auger and gear, remember: knowing how ice forms and being able to spot the difference between clear and white ice isn’t just book smarts—it’s hardcore survival on the hardwater.
2. Essential Tools for Measuring Ice Thickness
Before you even think about drilling your first hole, you need to have the right gear on hand to accurately measure ice thickness. The right tools not only keep you safe but also make your ice fishing adventure efficient and straightforward. Here’s a rundown of the must-have equipment and how to use each tool like a seasoned hardwater angler.
Must-Have Gear for Checking Ice Thickness
| Tool | Function | Pro Tips for Use |
|---|---|---|
| Ice Auger | Bores a clean hole through the ice for direct measurement and fishing access. | Manual augers are lighter and great for quick checks; power augers save time on thick ice but require maintenance. Always clear slush from the hole before measuring. |
| Spud Bar (Ice Chisel) | A heavy metal rod used to chip at the ice and test strength as you walk out. | Use with every step when venturing onto new or unknown ice. If it punches through in one hit, turn back—it’s not safe! |
| Tape Measure or Ruler | Measures actual thickness of the ice through your drilled hole. | Use a brightly colored, sturdy tape—mark the minimum safe thickness so you can spot it fast. Insert into the hole, hook under the bottom layer, and read at surface level. |
How to Use These Tools Effectively in the Field
Start with your spud bar as you move out onto the ice, especially early in the season or after any thaw. Test every few steps until you reach your intended spot. Once you’re confident in the initial thickness, drill a test hole with your auger. Immediately measure with your tape measure or ruler—never estimate by eye. Repeat this process periodically as you move or if conditions seem to change.
Remember, U.S. safety guidelines recommend at least 4 inches of clear, solid ice for foot traffic and 5-7 inches for snowmobiles or ATVs. When in doubt, check again—no fish is worth risking your life over thin ice.
3. Safe Ice Thickness Guidelines
When it comes to ice fishing in the U.S., playing it safe isn’t just advice—it’s gospel. Knowing exactly how much ice you need under your boots or wheels can be the difference between a killer day on the lake and an emergency call. Here are the benchmarks most seasoned American anglers swear by:
Walking On Ice
If you’re planning to hoof it out onto the lake, you want at least 4 inches of clear, solid ice. This is the bare minimum for foot traffic—anything less and you’re rolling dice with Mother Nature.
Snowmobiles and ATVs
Bringing along your snowmobile or ATV? Don’t even think about it unless there’s a solid 5-7 inches of clear ice. Anything thinner and your ride could take an unexpected plunge.
Small Cars
If you’re driving a compact car onto the ice, like a sedan or small SUV, play it cool and make sure there’s at least 8-12 inches of clear, hard ice beneath your tires. Even then, move slow and stick to established paths.
Trucks and Heavy Vehicles
For pickups and full-sized SUVs, you need serious ice—12-15 inches minimum. Local pros know that anything less is asking for trouble. And remember: always check local regulations and never push your luck.
Trusted Benchmarks from U.S. Anglers
These guidelines aren’t just numbers—they come straight from decades of experience across America’s frozen lakes. Always measure the ice yourself in multiple spots before setting out, and remember: white or slushy ice isn’t as strong as clear blue stuff. When in doubt, stay off. Safety first means more fish stories later.
4. Reading Ice Conditions Like a Pro
If you want to stay safe and land some lunkers, knowing how to read the ice is non-negotiable. In the States, seasoned anglers have their own set of tricks for sizing up ice before drilling a single hole. Here’s the lowdown on pro tactics and visual cues—straight from the American hardwater playbook.
Ice Color: Your First Tell
The color of ice gives away its strength in seconds. Black ice (no, not the highway kind) is actually clear and solid—prime time for fishing. Milky or white ice means air pockets and weak spots; its sketchy at best. If you see honeycombed or grayish ice, steer clear—its already starting to rot.
| Ice Color | What It Means | Safe? |
|---|---|---|
| Clear/Blue-Black | Strong, new ice | Yes, with proper thickness |
| White/Milky | Refrozen slush, weaker | Use extra caution |
| Gray/Honeycomb | Melting, dangerous | Nope—avoid! |
Cracks, Slush, and Pressure Ridges
If you hear cracks that sound like a .22 going off, relax—it’s just the ice settling. But spiderweb cracks or wide pressure ridges are red flags; they mark where ice shifts and can break up under your boots. Slush on top means water is seeping through weak spots—never trust slushy patches.
Current and Water Movement
Rivers, creeks, or even underwater springs keep ice thinner than you’d expect. In American lakes and reservoirs, always check upstream and downstream of any inflows or outflows; moving water eats away at the underside of the ice fast. If local old-timers say “stay away from the narrows,” take their word for it.
Temperature Fluctuations: Midwest Mindset
In places like Minnesota or Wisconsin, temps can swing 40 degrees in a day. Warm-ups after deep freezes create hidden hazards: snow melt pools on top and insulates the ice from further thickening. Always check recent weather reports—not just today’s temp—to get a real sense of what’s happening underfoot.
Pro Tip: Trust Local Intel
If you’re new to a spot, hit up the bait shop or ask another shanty dweller—American anglers love to share local scoop (and maybe show off a little). “When in doubt, spread out” is the motto; don’t cluster in one spot unless you know it’s bomber.
Key Observations Cheat Sheet:
- Clear blue-black ice = money spot for safety and action
- Wide pressure ridges = hard pass
- Slush patches = no-go zones
- Areas near current = double-check thickness every step
- Suds or bubbles rising = thin spots underneath
Get good at reading these signs like a true hardwater cowboy, and you’ll fish longer—and safer—all season long.
5. Common Hazards and Local Risk Factors
If you want to stay sharp and safe on the ice, knowing the biggest hazards is non-negotiable. North American lakes and rivers come with their own set of quirks that can trip up even seasoned anglers. Here’s what you need to keep your eyes peeled for every time you step out.
Spring Holes: The Hidden Threat
Spring holes are the silent saboteurs of ice fishing. These spots form where underground springs push warmer water up, thinning the ice above. Even during deep winter, a spring hole can be hidden under a dusting of snow—what looks solid could be one step from disaster. Always ask locals or check with bait shops about known spring areas before drilling your first hole.
Pressure Ridges: Nature’s Ice Cracks
Pressure ridges show up when shifting ice plates collide, creating cracks and heaves that might look harmless but can drop off fast or open unexpectedly. On big lakes like Lake Erie or Mille Lacs, these ridges can stretch for miles and change overnight. Never cross a pressure ridge without testing first—use your spud bar, and if water seeps up or the crack widens, back away.
Inflow/Outflow Areas: Where Water Moves, Ice Weakens
Any place where a river feeds into or drains from a lake is prime danger territory. Moving water eats away at ice from below, so thickness here is always less than surrounding areas. This goes double in early winter or late season when currents run strong. Mark these zones on your map and give them a wide berth, especially near bridges, culverts, or narrows where flow concentrates.
Stay Local: Know Your Waterbody
No two lakes are alike. Some have hidden currents, underwater springs, or sudden depth changes that impact ice stability. Talk to local pros, watch social media fishing groups for updates, and don’t trust old tracks blindly—a spot that held last week may be trouble today.
Pro Tip:
If you’re new to an area, follow experienced locals until you know the lay of the land—and never go alone when scoping unfamiliar territory.
6. Emergency Preparedness on the Ice
Action Steps: What to Do if You Fall In
If you or your buddy breaks through the ice, panic is your worst enemy. First, keep calm and fight the urge to thrash around. Turn toward the direction you came from—it’s likely where the ice is strongest. Spread your arms out on the unbroken surface, kick your feet, and try to slide your body onto the ice like a seal. Once on the ice, roll away from the hole instead of standing up immediately to distribute your weight until you reach firmer ground.
Must-Have Rescue Gear for U.S. Ice Anglers
No hardcore ice angler hits the hardwater without a few pieces of life-saving gear. At a minimum, pack a pair of ice picks (wear them around your neck for quick access), a throw rope (at least 50 feet), and a personal flotation device—yes, even over your heavy bibs. A whistle for signaling and a waterproof cell phone case are also critical. For group outings, bring along a throwable rescue sled or flat-bottomed boat if possible. The right gear can mean the difference between a close call and tragedy.
Practical Safety Routines
Before stepping out, check in with someone off the ice about your location and expected return time. Always fish with at least one partner and keep an eye on each other—no solo missions when conditions are sketchy. Drill test holes as you go to continuously monitor thickness. If you’re traveling by ATV or snowmobile, follow marked trails and avoid pressure ridges or discolored ice patches. Don’t let bravado override basic safety steps; routine checks keep everyone alive to tell their stories back at the truck.
Final Word: Be Ready, Not Sorry
Ice fishing in America’s North Country demands respect for Mother Nature’s unpredictability. When you prepare for emergencies with solid skills, reliable gear, and disciplined routines, you turn high-stakes risks into manageable challenges—so you can focus on pulling slabs through safe, solid ice season after season.