1. Introduction to 3D Printed Fishing Lures
Fishing has always been a sport of innovation, from hand-carved wooden plugs to modern injection-molded plastics. Today, 3D printing is making waves in the world of fishing tackle by giving anglers and lure designers the ability to create custom lures quickly and affordably. Whether youre a weekend warrior or a hardcore tournament angler, 3D printing opens up new possibilities for designing, testing, and refining lures right from your garage or workshop.
How 3D Printing Is Changing the Game
With traditional lure manufacturing, creating a new design often involves expensive molds, long lead times, and large production runs. But with 3D printing, you can go from a digital concept to a physical prototype in just hours. This makes it easier than ever to experiment with shapes, weights, and color patterns without breaking the bank.
Key Benefits of 3D Printing for Lure Design
| Benefit | Description |
|---|---|
| Rapid Prototyping | Create and test multiple designs quickly to find what works best. |
| Cost-Effective | No need for expensive molds or minimum order quantities. |
| Customization | Easily tweak size, action, and profile to match local conditions or specific species. |
| Creative Freedom | If you can model it in CAD software, you can print it—no limits on creativity. |
A New Era for DIY Anglers
The accessibility of desktop 3D printers means that more anglers are getting involved in designing their own gear. It’s not just about saving money—it’s about building something unique that’s tailored to your fishing style. Want a topwater bait with a crazy walk-the-dog action? Or maybe a swimbait that matches your local baitfish perfectly? With 3D printing, the only limit is your imagination.
2. Getting Started with CAD for Lure Design
If youre new to designing fishing lures with 3D printing in mind, the first step is learning how to use CAD (Computer-Aided Design) software. CAD tools let you create precise digital models of your lure ideas before printing them. In this section, we’ll walk through some popular CAD programs and cover the basics of creating effective lure shapes that perform well in the water.
Popular CAD Software for Lure Design
There are several CAD programs to choose from, each with its own pros and cons. Heres a quick breakdown:
| Software | Price | User Level | Notes |
|---|---|---|---|
| TinkerCAD | Free | Beginner | Web-based, great for simple designs and learning basics. |
| Fusion 360 | Free for hobbyists | Intermediate to Advanced | Powerful features, ideal for detailed lure design and prototyping. |
| SOLIDWORKS | Paid (professional) | Advanced | Used in professional engineering, high precision modeling. |
| Blender | Free | Intermediate | Mainly for artistic modeling, but can be used creatively for lures. |
Lure Design Basics: What Makes a Good Lure Shape?
A successful lure doesn’t just look cool—it needs to perform well in the water. Here are some important principles to keep in mind when designing your lure:
Bouyancy
Your lures buoyancy determines whether it floats, sinks, or suspends in the water. This depends on both the material used and the internal volume of your design. For floating lures, youll want hollow spaces or lightweight infill patterns inside your print.
Weight Distribution
The way weight is spread throughout your lure affects how it swims and how it sits in the water. For example:
- A tail-weighted lure will have a nose-up posture and may dart or dive when retrieved quickly.
- A head-heavy lure tends to sink faster and creates a different action pattern during retrieval.
Lure Action
This refers to how your lure moves—wobbles, wiggles, glides—when its pulled through the water. Action is influenced by shape, fin placement (if any), lip angle (for crankbaits), and even surface texture. Use CAD to experiment with these elements before printing your prototype.
Tips When Starting Your First Lure Model
- Simplify your first design: Start with a basic minnow shape or topwater popper before moving on to complex jointed swimbaits or crankbaits with diving lips.
- Add features gradually: Once youre comfortable with shape modeling, try adding hook hangers, eye sockets, or internal chambers for rattles or weights.
- Create separate components: Design parts like bills or fins separately so you can swap them out easily or modify them without changing the whole model.
The beauty of using CAD is that you can tweak every little detail of your lure until it’s just right—before committing filament and time to print it. Up next, we’ll explore how to optimize your 3D print settings for fishing lures that are strong, detailed, and ready for real-world testing.
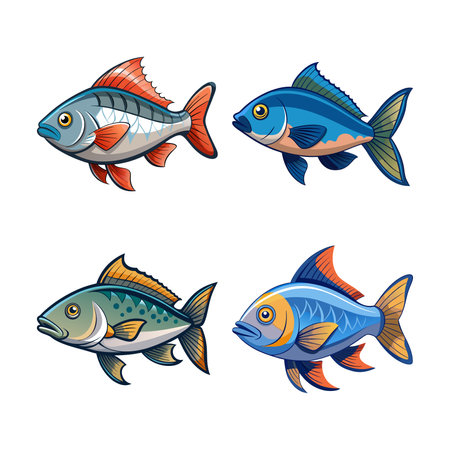
![]()
3. Choosing the Right Filament and Print Settings
Once youve got your lure design ready, its time to bring it to life with a 3D printer. But not all filaments and print settings are created equal—especially when youre making fishing lures that need to be tough, water-resistant, and smooth enough to glide through the water naturally. Heres how to pick the right materials and dial in your settings for great results.
Top Filament Choices for Fishing Lures
When printing fishing lures, durability and water resistance are key. You’ll want a filament that won’t absorb water, can handle outdoor conditions, and is strong enough to survive bites and snags.
| Filament Type | Pros | Cons | Best Use |
|---|---|---|---|
| PETG (Polyethylene Terephthalate Glycol) | Water-resistant, strong, good layer adhesion | Slightly stringy if not tuned well | All-purpose lures; topwater or crankbaits |
| ABS (Acrylonitrile Butadiene Styrene) | Tough, impact-resistant, smooth finish | Needs enclosure; prone to warping | Lures requiring high strength and detail |
| Nylon | Super strong, flexible, abrasion-resistant | Absorbs moisture over time; trickier to print | Swimbaits or flexible lure parts |
| PLA+ (Enhanced PLA) | Easy to print, decent strength, smoother than standard PLA | Less heat and UV resistant | Prototype lures or indoor testing models |
Tuning Your Print Settings for Performance
The right filament is only half the battle—you also need optimized print settings to get the best out of your material. Here are some go-to settings that work well for most fishing lures:
Nozzle Temperature & Bed Temp
- PETG: 230–250°C nozzle / 70–80°C bed
- ABS: 240–260°C nozzle / 90–110°C bed (use an enclosure)
- Nylon: 240–260°C nozzle / 60–70°C bed (dry before use)
- PLA+: 200–220°C nozzle / 50–60°C bed
Layer Height & Infill Tips
- Layer Height: Go with 0.1mm–0.2mm for better surface quality—important for hydrodynamics.
- Infill: Use at least 40% infill with grid or gyroid patterns to balance weight and strength.
Slicing Tips for Smooth Finishes
- Enable “Ironing” or “Surface Smoothing” features if available in your slicer.
- Add supports wisely: Use tree-style supports for complex lure shapes without damaging the surface.
- Shrinkage compensation: ABS and Nylon tend to shrink—scale your model slightly if needed.
A Few Bonus Tips from the Tackle Box
- Dye or paint after printing: Most filaments come in basic colors—you can customize later using acrylic paints or waterproof dyes.
- Add weights or rattles: Design internal cavities where you can insert lead weights or rattles before sealing the lure.
- Smooth with solvent (for ABS): Acetone vapor smoothing can give ABS lures a glossy, professional look—and reduce drag in water.
Selecting the right filament and dialing in your print settings makes all the difference when crafting custom fishing lures that hold up on the water. Up next, well dive into post-processing techniques thatll make your printed lures look and perform like store-bought gear—or better.
4. Post-Processing and Rigging Your Lures
Once your 3D printed fishing lures come off the printer, they’re not quite ready to hit the water just yet. To make sure they perform like store-bought—or even better—you’ll need to go through a few post-processing steps. This includes sanding, sealing, painting, and rigging them with hooks and hardware. Let’s break it all down step by step.
Sanding: Getting a Smooth Surface
Most 3D prints have layer lines that can affect both the look and performance of your lure. Start with medium-grit sandpaper (around 120 grit) and work your way up to finer grits like 220 or even 400 for a polished finish. Wet sanding helps reduce dust and gives a smoother surface.
Sealing: Waterproofing Your Lure
PLA and other common filament materials aren’t naturally waterproof. Applying a sealant protects your lure from water damage and prepares the surface for paint. Use a brush-on epoxy resin or a couple of coats of clear acrylic spray sealer. Let each coat dry thoroughly before moving on.
Painting: Make It Look Real
This is where you can get creative. Use acrylic paints or airbrush for the best results. Add base colors first, then layer in details like scales, eyes, or stripes. Finish with a few coats of clear gloss spray to protect your paint job and give it that wet-look shine.
Basic Painting Supplies:
| Item | Purpose |
|---|---|
| Acrylic Paints | Main coloring of lure body |
| Airbrush or Brushes | Applying paint layers |
| Clear Gloss Spray | Protective topcoat |
| Painter’s Tape | Masking off areas for clean lines |
Adding Hardware: Hooks and Split Rings
The final step is turning your painted body into a functioning lure. You’ll need split rings, treble hooks, screw eyes, and sometimes weights depending on your design. Use pliers to attach hardware securely.
Essential Rigging Components:
| Component | Description |
|---|---|
| Split Rings | Connect hooks to lure body; allows free movement |
| Treble Hooks | Main hooking mechanism; size depends on lure type |
| Screw Eyes or Wire Loops | Used for line tie points and hook mounting spots |
| Weights (optional) | Add balance or sinking action based on design needs |
Pro Tip:
If youre using screw eyes, drill small pilot holes first to avoid cracking the lure body when twisting them in. A drop of super glue in the hole adds extra hold strength.
With these steps complete, your 3D printed lure will be ready to rig up and toss into your favorite fishing spot!
5. Field Testing and Performance Tuning
Once youve 3D printed your fishing lure, its time to see how it performs in real-world conditions. Field testing is a crucial step that helps you understand how your lure behaves in the water and what adjustments might be needed for better results. Heres how you can test, evaluate, and fine-tune your custom lure.
How to Test Your Lures On the Water
Head to a local fishing spot where you know fish are active. Bring along your usual gear, as well as a notepad or phone to record observations. Start by casting the lure and observing:
- Casting Distance: Does it cast smoothly and reach a good distance?
- Swimming Action: Watch how it moves through the water—does it wobble, dart, sink, or float as intended?
- Stability: Does it stay upright or flip over?
Gathering Performance Feedback
Pay attention to both visual cues and fish behavior. Are fish following but not striking? Does the lure move unnaturally? You can also ask fellow anglers for their opinions if youre testing at a public lake or river.
Performance Checklist
| Feature | What to Look For | Possible Fixes |
|---|---|---|
| Casting Distance | Lure doesnt cast far enough | Add weight or adjust shape for better aerodynamics |
| Swimming Action | Lure swims too stiffly or erratically | Redesign tail fin or adjust joint flexibility |
| Sinking/Floating Behavior | Lure sinks too fast or doesnt sink at all | Tweak internal buoyancy with foam inserts or hollow sections |
| Strike Effectiveness | Fish follow but don’t strike | Change colors, add scent grooves, or modify action pattern |
Refining Your Design for Better Results
After testing, go back to your CAD software and make small adjustments based on what you observed. You might need to reprint one or two versions before getting the perfect balance between casting performance, swimming action, and fish attraction.
Tuning Tips:
- Add Weight Gradually: Use split shot weights or lead tape during testing before modifying the model permanently.
Try calm lakes vs. moving rivers to see how your lure performs under varied water dynamics. Record underwater footage (a GoPro works great) to analyze motion more precisely.
The key is to treat each outing like a mini-experiment. With every test and tweak, youre getting closer to building a custom lure that truly outperforms store-bought ones—because its dialed in just right for your fishing style and local waters.